Showing posts with label apartment decorating. Show all posts

Monday, October 24, 2016

Apartment Nesting: Grateful for Furniture

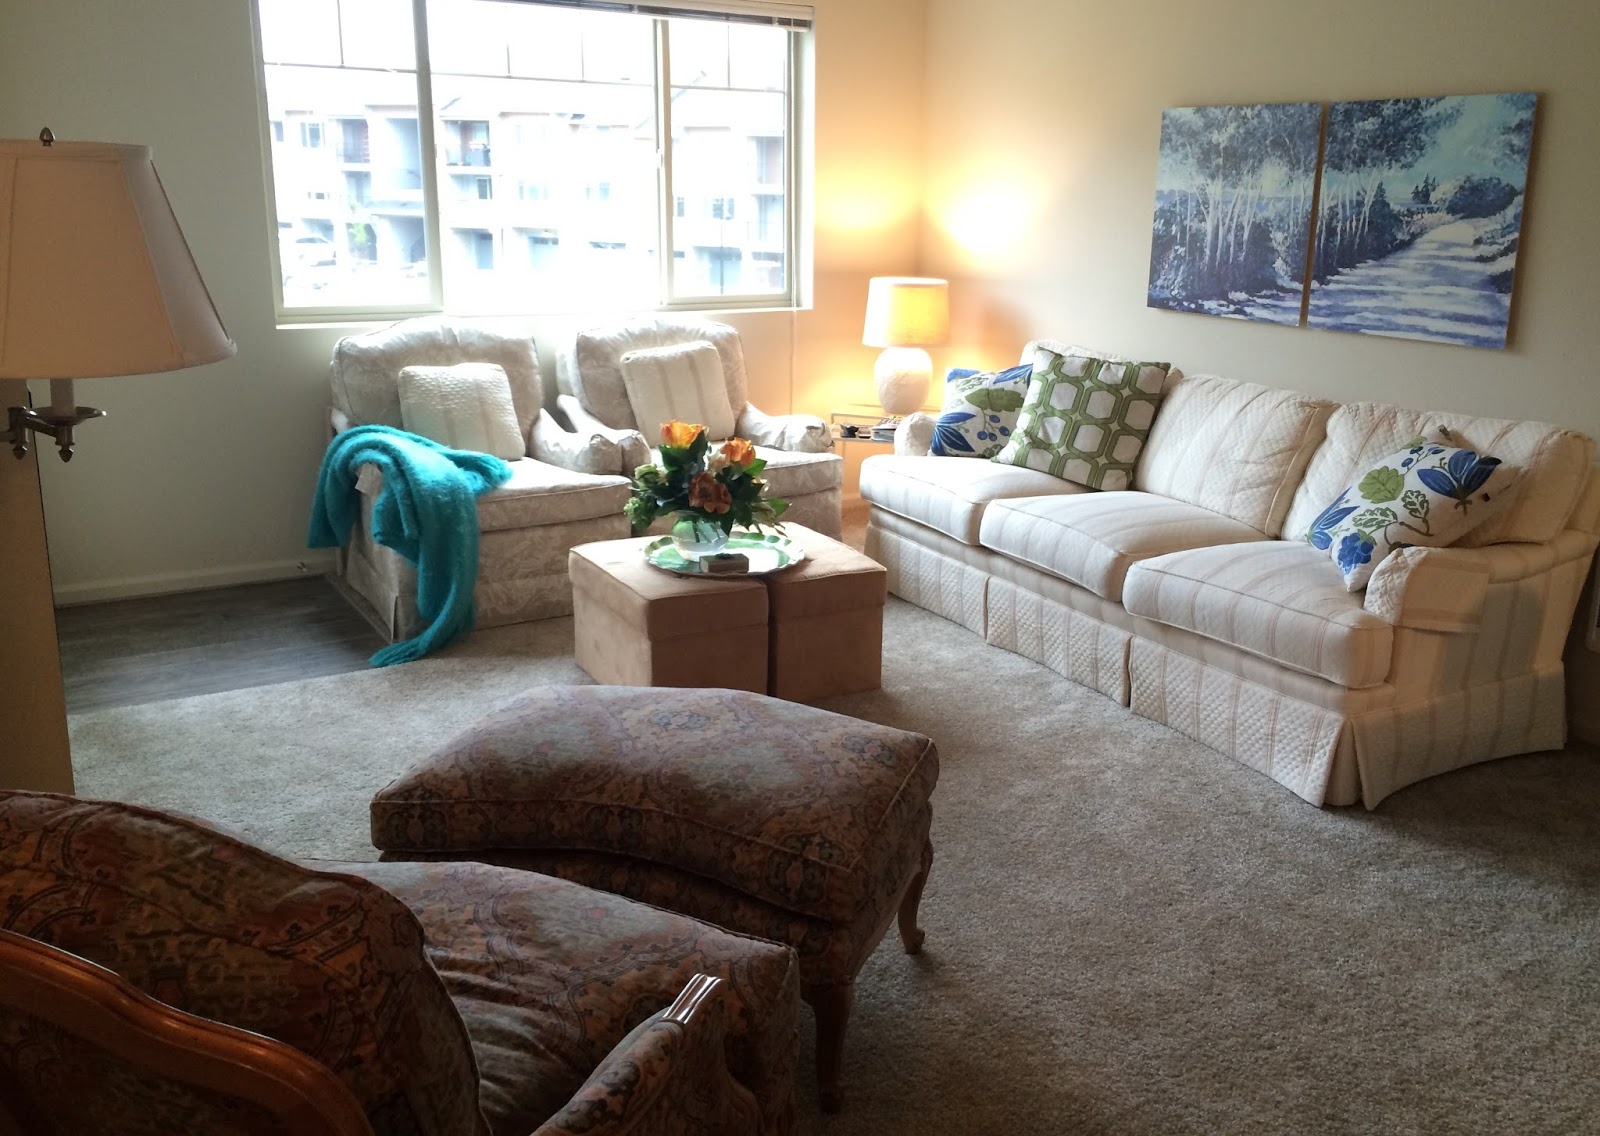
When Dan took a job in Seattle, we were challenged with setting up another place to call home. We were so very lucky that my parents had extra furniture they could spare. When we told them we were setting up an apartment, they suggested we put this couch, these 2 chairs and the print chair/ottoman set on the truck. 

Our plan was to keep our house in Michigan for a year or so and I would travel back and forth. Their furniture allowed us to skip the futon and make a nice little home for ourselves as we transitioned. It has been a year and 9 months since Dan moved in and a lot has changed. We've sold our house in Michigan and are building in a neighborhood on the East-side of Seattle.  The funny thing is that my mom now has her own place out here in Seattle and plans on spending the winters here with us. When she comes to our apartment for dinner, sits on her couch and says "I like what we've done with the place." I usually counter with something along the lines of, "Feeling nostaglic?" It is familiar for both of us and that's wonderful.

We made the place our own by hanging a favorite pair of prints called Silver Birches by Nell Revel Smith over the couch. She paints the area in northern Michigan where we've always spent the summer and her work always makes us feel relaxed.

My mom and I scoured Homegoods and TJ Maxx for pillows with blues and greens to pull color from the art. I added a teal angora throw on one chair and placed a large circle melamine platter of a succulent (it looks a bit like this) on the butterscotch suede footrests. Doesn't it look pretty? We have since hung floor to ceiling off white drapes to soften the windows, but the room looks essentially like this. 

Thursday, January 28, 2016

Apartment Living: My $3 Headboard

When decorating this apartment, I am trying to make what I have on hand look wonderful.  

I want to blend the traditional furniture I have (some wonderful pieces that my parents were no longer using) with the fun of living in a new space. 

The moving van arrived and we sent a melange of furniture and housewares out to Seattle. 

The missing piece was a bed. The week we moved in, we had a mattress and box spring delivered from a local retailer. I had purchased a mustard and white Max Studio comforter set at Homegoods in Palm Beach Gardens and when Dan flew from Seattle to Palm Beach to meet me last winter, I had him bring two empty suitcases. When he arrived, he realized that he would be flying a huge pile of linens for our new apartment all the way from Florida. 

Don't you love the lilac Vera Wang euro shams? Found in Florida at T.J. Maxx. The same goes for the Celerie by Celerie Kemble yellow stripe blanket and the Ralph Lauren mustard polka dot sheets. This budget bedroom is beautiful.

The headboard is a $3 string of white lights on white wire. I imagined the shape of a traditional headboard, posts and all, and carefully pushed clear push pins into the wall to form the outline. I used very few pins and found that attaching the lights (the two wire strand can be gently separated and fit right over the push pin) as I pushed the pins in the wall made it easier to "see" the headboard come to life and stay true to the shape I wanted.  Isn't it darling?  

Thursday, May 14, 2015

Art Eases Long Distance Friendships

I wanted to show you a little something I made to make myself feel better, a collage of photographs of my friends near and far. 

Moving to the other side of the country, even part time, is a big deal. My friends at home want to know "when I'll be back" and as I forge new friendships in Seattle, I hear "You're leaving so soon?" 

I wanted to make an art piece that would let me take my friends from around the country out West with me.

I had seen options online offered by photo companies. They will build a similar collage from submitted photos, but I thought I would give it a try myself. I supplemented my heart with images of things I love (my roses, antique dishes, sentimental vistas) and I am so happy with how it turned out.

My process, in a nutshell, was to:
  • print images in "contact sheet" size
  • arrange images in a heart
  • glue each photo to a piece of mat board, cut to the size of my frame
  • slip it into the frame
  • pack it carefully for the move across the country
  • hang it in our new apartment where I can see it often
I hope that each and every person in my collage makes the trip out to see me in Seattle. Boy do I have some things to show you!

Friday, March 27, 2015

Apartment Decorating: A Paper Enhanced Acrylic Tray: An Inexpensive Custom Touch

I had days to wait for the truck to arrive with our furniture and housewares. I had an empty apartment and dreams of decorating. I accomplished a lot of "setting up an apartment" errands and did what I could to pass the time.  I visited Michaels Craft store every day as I plotted a way to make a wall of mirrors, evaluated their stock of picture frames and considered the color palate for our new nest.
You can see the promotional color board (above) that the apartment complex chose. The painted walls are biscuit (shown above as off white but in reality far more deep beige), the carpeting is a warm chestnut, the kitchen has dark walnut cabinets with stainless steel appliances and the kitchen and bathroom floors are linoleum, but look like a soft barn wood grey. 

It's a strong color palette and I like it, but it leans more toward Pottery Barn than Shabby Chic. I wanted to make something that would make the color palate seem a little more friendly. I put together a collection of fabrics that I was working with and took a picture. Whenever I am shopping, I referred to this picture on my phone. 
From the top, a pink and tan stripe fabric (tablecloth), 2 yards of fabric: gray with white lace-like flowers (use TBD), cream/tan stripe pillow cushion (couch), darker brown/gold/lt teal print cushion (chair - actually the best match for the apartment coloring), gray & white print cloth napkins, taupe/white oak leaf (dish towel) and pink/gray/cream patchwork (throw). My "mood board" so far was leaning a little feminine, so when I was shopping for paper for this project, I tried to bring in the colors of the darker print chair. For me, that translated to polka dots in tan and gold.

I was impatient to unpack boxes, but they were on a truck somewhere in the Great Plains, so I thought a craft project would help me bide my time. I found two acrylic platter in the party department at Michaels (on clearance for $2.50 each) and then picked up a foam sponge (59 cents), Elmer's white glue ($1.89?) and two sheets of scrapbook paper.
The only real qualification when selecting the paper is making sure that it is large enough to cover the center oval surface area of the platter. Also try not to choose a paper that has actual texture or depth. Texture gives the place for the glue to rest and it won't dry well.  

Choose a print that will enhance your decor. A bright pink and green toile. A classic red plaid. A dreamy tye-dye. Once you start to look, you'll be surprised how many scrapbook papers look like fabric. Most sheets are just 59 cents. How can you go wrong? Peel the manufacturer label carefully off the back of the platter.
Lay the platter face down and then lay the paper (printed side down) onto the bottom of the platter. The bottom oval of the platter is where you will glue the paper. Hold the paper steady and rub your finger around the rim of the center lip. This will trace the oval and give you an easy mark to follow when cutting the paper. Cut out the oval following the dent on the paper.
Dispense a thin stream of glue around the center oval on the bottom of the platter. Spread it evenly with the foam brush. Place the paper oval printed side down (so that the design will show through the plastic when you turn the platter over) onto the glue.  Smooth the paper and try to eliminate any bubbles by gently sliding your finger across the paper. Allow to dry. 
Now you have a designer-touch platter that is still food safe. The glue and paper are on the bottom of the acrylic tray and you can arrange the fruit, cheese and crackers on top and all's well. I intend to cut a piece of adhesive felt (also available at Michaels for about $1.80) and adhere it to the bottom of the platter, over the paper. It will give it a nice, slide on the counter, finish. Just be sure to hand wash the platter carefully.

In my oh-so-empty apartment, my cute new polka dot tray looks great and makes things feel a bit more like home. A plastic cup "vase" of fresh daffodils helps too.