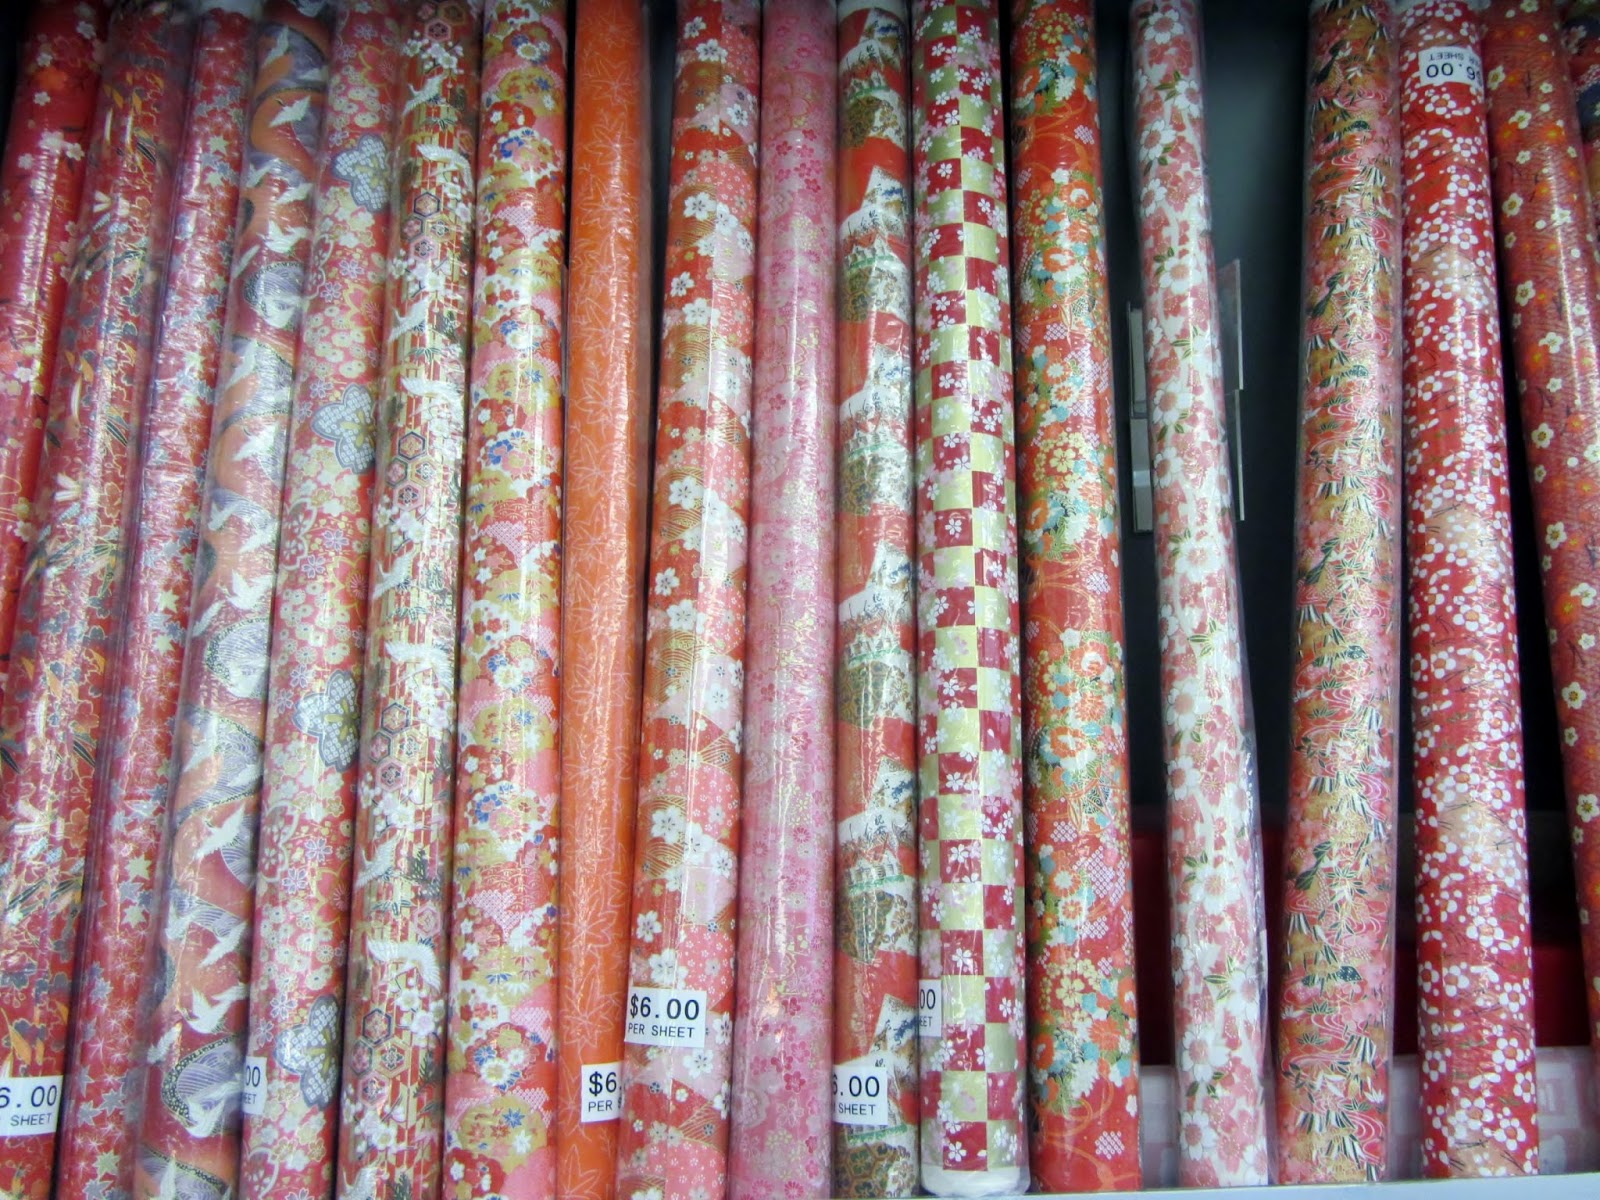
When paper is displayed like fabric, I feel right at home. This beautiful selection of Washi Paper is at Kinokuniya Bookstore in Seattle. The entrance to the bookstore is within Umajimaya, an Asian marketplace that you will also have fun exploring. I spent a lot of time in the paper craft area (remember when I made paper pastries from a Japanese kit?) and I marveled at the selection of colored ink pens. I bought myself a periwinkle mini notebook and matching ink pen.
I poured over the selection of Japanese magazines and found a really neat craft magazine. Naturally I can't read it (or the title) but it says "Chic Chic" in English on the front and is loaded with ideas to design with yarn, paper, frosting. I can't wait to sit down and "read" it. I know that I will be inspired by the photographs. The magazine itself also looks good displayed on my ottoman next to a Japanese tea service. Win-win.
The beauty of everyday life - photographs, thoughts and ideas from Anne Reeves.
Showing posts with label Paper. Show all posts
Monday, May 5, 2014
Wednesday, February 6, 2013
Paper Garden
This is an optical illusion for sure. You are looking at a paper water garden (complete with koi fish!) in Ray Marshall's magnificent book, Paper Blossoms. It was given to my mother and she brought it along with her to Florida so that they could have flower arrangements any time they wanted.
Book is contains 5 perfect pop-up bouquets. It is a masterpiece, really. I can only imagine the vision and determination it takes to get an intricate book like this produced. Each morning during my visit, I come out into the family room and see a bouquet open on the table. This lily pond is a favorite.
On this 4th day of the 12 Days of Valentine's Day, go buy some Valentines and send them off to those who would love a surprise in their mailbox.
Friday, October 19, 2012
Custom Timepiece
I have made little works of art by covering matchboxes with scrapbook paper and stickers, used scalloped paper as a doily and made my own cute clips using clothespins. But this may be my favorite project of all. A clock!
I bought a sheet of Bo Bunny scrapbook paper that looked like a clock face and I glued it to the front of a clock kit from the craft store. It is as light as air and made of paper - but it is a real clock! Now I have a custom timepiece hanging in my office that is just my style, beautiful and interesting.
Friday, August 24, 2012
A Scrap of Paper
The design on this paper works so perfectly with my heart-shaped shell box, that it is actually difficult to see where the box ends and the paper begins. Isn't that interesting? I wouldn't have believed it was possible, if I hadn't seen it myself. My own little Modern Doily made with one sheet of scrapbook paper.
You know that I love to use scrapbooking paper in vignettes when I decorate (see my Sweet Halloween tablescape here) but the great thing about this post is that the sheet of paper was part of my birthday present from my friend, Angie! I didn't even choose the paper design and it still works perfectly with some of my treasures.
This is where I will advocate "walking around your house carrying the object you want to incorporate into your design." I'm sure that quote won't trip off the tongues of the HGTV hosts anytime soon. But I am serious! You will never know how something will look (or what it will look good with) until you experiment. I would never have put some of my shell boxes with this paper if I hadn't seen them near each other.
The white shell box actually got my attention first. I realized that the white flowers and dark background would make the little box seem delicate sitting on top of the fabric-like print. When I added another shell box to try and fill up the empty space, I was shocked at how the colors blended together. It's gorgeous!
I have this pretty vignette on a black coffee table in between two candlelight white love seats. It is a delightful conversation piece. Thanks, Angie!
Tuesday, June 26, 2012
Darling Clothespins
What took me so long? I mean really, I've thought about gluing pretty scrapbook paper onto plain wooden clothespins for months. When I finally sat down to do it, it only took about 15 minutes to make them! I wish I had tried it sooner, I would have had more time to enjoy them.
Right now I am using them to manage the stacks of papers in my office. These piles are no match for paper clips! And they are SO much cuter.
The "instructions" for making these are embarrassingly easy. Find pretty scrapbook paper - I like using a mix of similar papers, instead of making a set of matching clothespins, but it is up to you. Use a glue stick to rub a thin layer of glue on one side of the clothespin. Smooth glue out with you finger if necessary. Stick paper to clothespin, lining up one end and one side so that it "fits" perfectly on the clothespin and smooth out bubbles/wrinkles, if any. Allow to dry. When it is dry, cut excess paper off of the other two side of the clothespin where the paper hangs over. Start the same process on the other side. Voila!
I found myself using the assembly line system. I worked on 5 different clothespins (on one side) and let them dry. By the time I got to the 5th clothespin, the 1st was about ready for me to work on it's flip side. Very efficient. And super cute!
Right now I am using them to manage the stacks of papers in my office. These piles are no match for paper clips! And they are SO much cuter.
The "instructions" for making these are embarrassingly easy. Find pretty scrapbook paper - I like using a mix of similar papers, instead of making a set of matching clothespins, but it is up to you. Use a glue stick to rub a thin layer of glue on one side of the clothespin. Smooth glue out with you finger if necessary. Stick paper to clothespin, lining up one end and one side so that it "fits" perfectly on the clothespin and smooth out bubbles/wrinkles, if any. Allow to dry. When it is dry, cut excess paper off of the other two side of the clothespin where the paper hangs over. Start the same process on the other side. Voila!
I found myself using the assembly line system. I worked on 5 different clothespins (on one side) and let them dry. By the time I got to the 5th clothespin, the 1st was about ready for me to work on it's flip side. Very efficient. And super cute!
Thursday, March 22, 2012
Pop Up Village
Wouldn't you like to shop in this little village? This is my favorite pop up book, James Herriot's Yorkshire Village. The description on the book jacket says that the illustrations by Jane Reynolds and paper engineering by Paul Wilgress were inspired by the series, "All Creatures Great and Small," which was a tv series based on the books by James Herriot. Do you know it? I don't, not at all!
My mom has always loved paper buildings and she gave me this book a few years ago. I've recently started displaying it on a table in my family room as art. I love to look at this 3-dimensional scene from different angles and let my mind wander a bit. There is a church yard, a cottage with a garden and two village scenes with shops etc. It comes with townspeople too, that you can stand up with a paper support and have them move about the village. I mean, who wouldn't want that?
Can you see the shadow of the cat in the doorway? And you should know that the windowsills open and close, exposing detailed rooms behind. So cool! It is like a collapsible paper dollhouse.
This is the kind of item that has me reiterating my motto, "Never Underestimate the Power of Cute."
My mom has always loved paper buildings and she gave me this book a few years ago. I've recently started displaying it on a table in my family room as art. I love to look at this 3-dimensional scene from different angles and let my mind wander a bit. There is a church yard, a cottage with a garden and two village scenes with shops etc. It comes with townspeople too, that you can stand up with a paper support and have them move about the village. I mean, who wouldn't want that?
Can you see the shadow of the cat in the doorway? And you should know that the windowsills open and close, exposing detailed rooms behind. So cool! It is like a collapsible paper dollhouse.
This is the kind of item that has me reiterating my motto, "Never Underestimate the Power of Cute."
Monday, October 10, 2011
Tissue Paper Bouquet
I wanted a bouquet of flowers that would last. And last. This pretty pink arrangement looks as beautiful as the day I brought it to the hospital. All thanks to Martha Stewart and her tissue paper flower machine.
Yes, I said machine. Years ago I bought a paper flower crafting tool from the Martha Stewart Catalog For Living. It must have been at least ten years ago now, I can't even find an example of it to show you on the web!
With this tool, I simply lay a small stack of tissue paper on the grid lines, close the arm and slowly pull the lever down. The result is perfectly folded sheets of tissue paper that can be pinched in the middle with a ribbon tie and then fluffed into flowers. Love it!
I did find these paper flower instructions on the Martha Stewart website. You can follow these steps and get the same effect as mine. To get the "Dahlia" look of the petals (flower, shown in front), cut a "V" in the end of the folded tissue stack before fluffing. To get the look of a peony, leave the stack uncut and simply fluff.
Then, to drive the nurses crazy, put your arrangement in a French lemonade bottle with a pink label and tie it with a grosgrain ribbon. This little beauty says "Get Well Soon!"
Yes, I said machine. Years ago I bought a paper flower crafting tool from the Martha Stewart Catalog For Living. It must have been at least ten years ago now, I can't even find an example of it to show you on the web!
With this tool, I simply lay a small stack of tissue paper on the grid lines, close the arm and slowly pull the lever down. The result is perfectly folded sheets of tissue paper that can be pinched in the middle with a ribbon tie and then fluffed into flowers. Love it!
I did find these paper flower instructions on the Martha Stewart website. You can follow these steps and get the same effect as mine. To get the "Dahlia" look of the petals (flower, shown in front), cut a "V" in the end of the folded tissue stack before fluffing. To get the look of a peony, leave the stack uncut and simply fluff.
Then, to drive the nurses crazy, put your arrangement in a French lemonade bottle with a pink label and tie it with a grosgrain ribbon. This little beauty says "Get Well Soon!"
Friday, December 12, 2008
11 Ladies Dancing: Christmas Decoration
Years ago, Martha Stewart published instructions for making a holiday garland to honor the Christmas carol "The 12 Days of Christmas."
I loved the garland of the eleven ladies dancing and chose to recreate them as individual ballerinas. They're made from white poster board (I traced Martha's template) and are dressed in paper gowns I made. Some have tissue paper skirts, others wear ribbon dresses, some even have paper doily aprons, but the color scheme is always simply red and white. I would include a link to the template, but it isn't online. The Martha Stewart Living issue was from the 1990's.
I love these ladies that dance and swish their skirts around my Christmas tree.
I loved the garland of the eleven ladies dancing and chose to recreate them as individual ballerinas. They're made from white poster board (I traced Martha's template) and are dressed in paper gowns I made. Some have tissue paper skirts, others wear ribbon dresses, some even have paper doily aprons, but the color scheme is always simply red and white. I would include a link to the template, but it isn't online. The Martha Stewart Living issue was from the 1990's.
I love these ladies that dance and swish their skirts around my Christmas tree.
Monday, January 28, 2008
Book Sculpture
For years I have been interested in the art of turning old books into sculpture by making exact repetitive folds in the pages. The examples I have seen are truly spectacular - little works of art. Mary Engelbreit's Home Companion had an article full of beautiful examples of book sculpture along with some basic instructions. If there was a link, I'd share it, but no such luck!Someday when my library has a book sale, I will try to find an old copy of Nancy Drew and make one for myself. Yesterday, for the first time, I saw some of these sculptures for sale...price tag $500 each.
Wednesday, May 23, 2007
Pretty Match Boxes

What do I love? When everyday items are pretty. Other than a fabulous large box of Martha Stewart Everyday matches from Kmart, all of my matches were from restaurants - not my thing.
I wanted something sweet laying around suggesting candlelight. Enter my new little obsession: coordinating match boxes! A little collection in itself made by covering small Diamond matchboxes with scrapbook paper and embellishments.
Subscribe to:
Posts (Atom)

